
3D-printed lightsaber design philosophy and printing tips
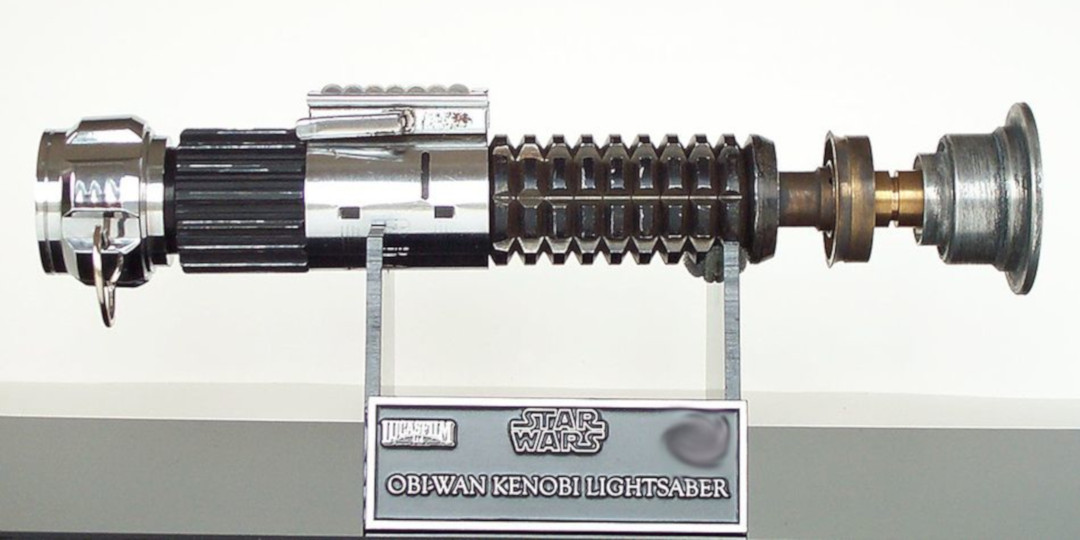
For May the 4th, I' designed a 3D printed lightsaber in commemoration of Star Wars day in collaboration with Ultimaker. There were many other designs out there, but none that I was really happy with. The examples I saw were mostly oversimplified, impossible to print without supports, or difficult to assemble. I knew I wanted something more faithful to the original prop with better surface quality. So I set out to build my favorite design from the series.

4 vs 14 piece design
I ended up making two versions of the Lightsaber, a 4 piece version which stresses ease of printing and assembly, and a 14 piece version that makes no compromise on surface quality. The 4 piece model has been available since May the Fourth, but now (July 2nd), we are also releasing the 14 piece model.
In this guest blog, I will explore some of the design nuances, by comparing the two design philosophies represented by the simple and complex versions of the lightsaber model.
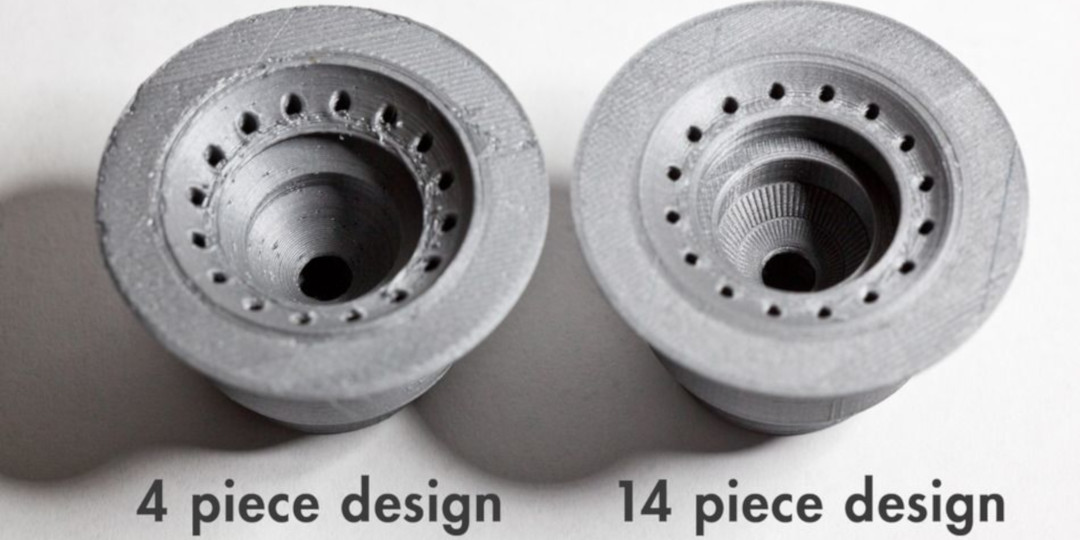
This is an example of how printing direction could potentially limit your designs, but could be overcome by printing in multiple parts. The one on the left is printed face down as one piece, and the one on the right printed in 3 parts. In order to successfully print the left version, many of the interior angles need to be made more obtuse, deviating from the original prop. Even with those modifications, we have some surface imperfections. No such problem on the 14 piece to the right.
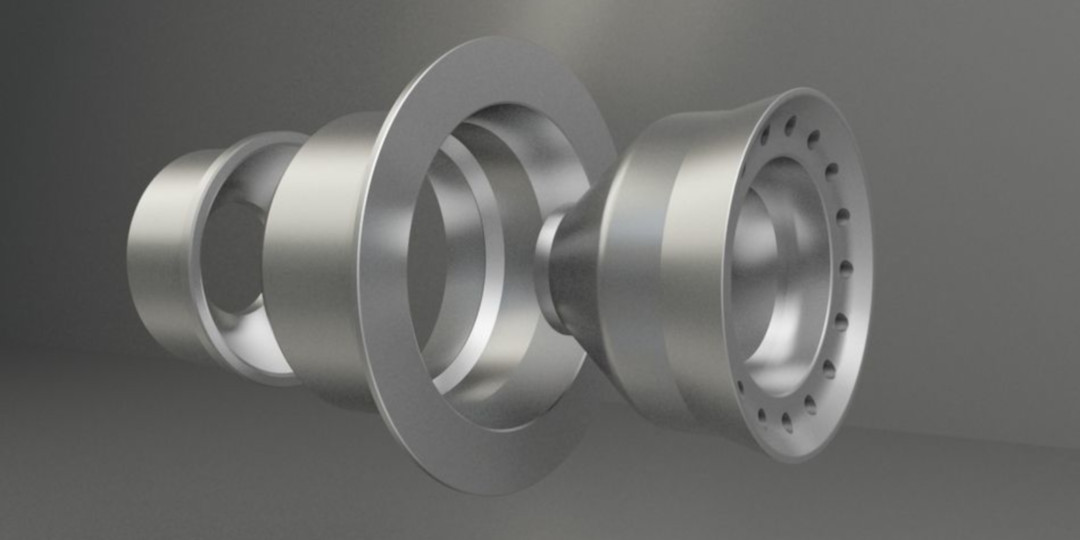
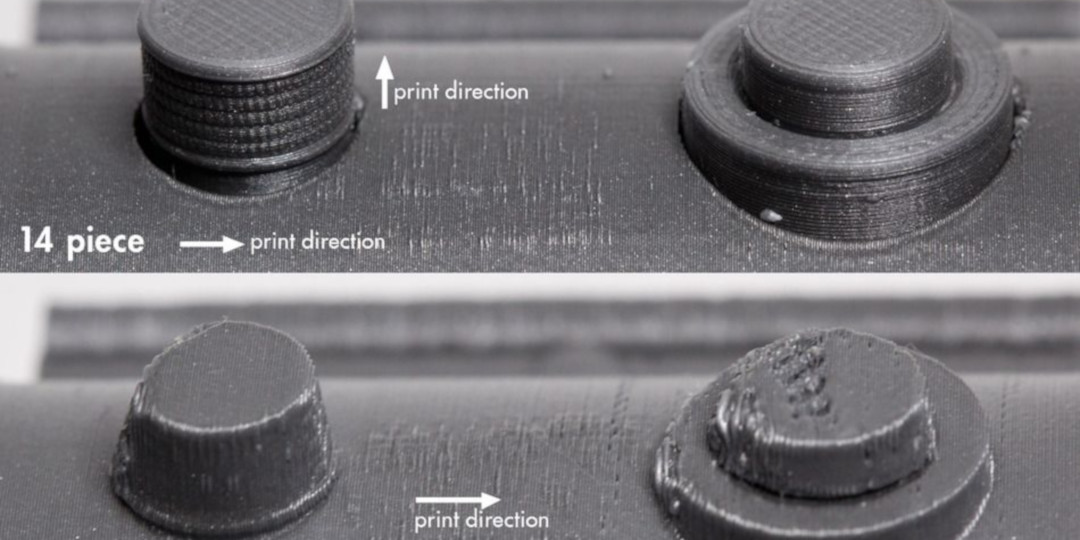
Next we have the button details. The buttons can hold much higher levels of detail if printed in a different direction than the clamp. The 4 piece compromises on those details for ease of assembly. But we can clearly see the missing details and overhang artifacts.
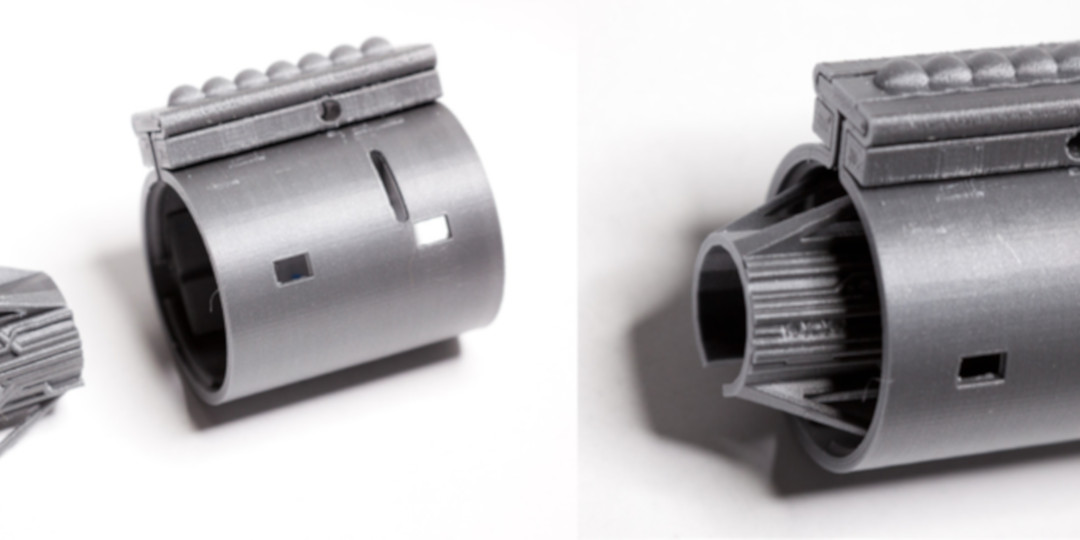
In order for the buttons to stay in place without glue, I designed this ‘core’. Which keeps everything tight on the insides once the clamp is tensioned down since the clamp is hollow. There is another reason for this piece, it can be removed if you want to add that special something to your lightsaber.
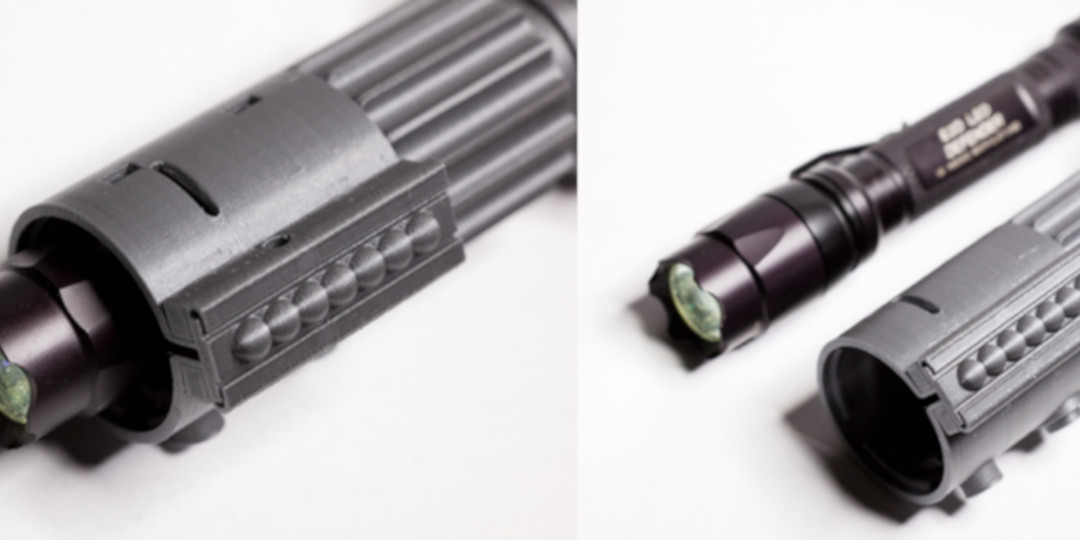
I came across many examples in my research where people built crystal chambers and lighting modules inside the body. I wanted the complex version of this to be able to accept that kind of modification if so desired. The thing about 3D printing is, not only can you design the outsides, but the insides just as well. You can fit a relatively large flashlight in the hilt with room to spare so most laser modules should fit for a stunning effect.
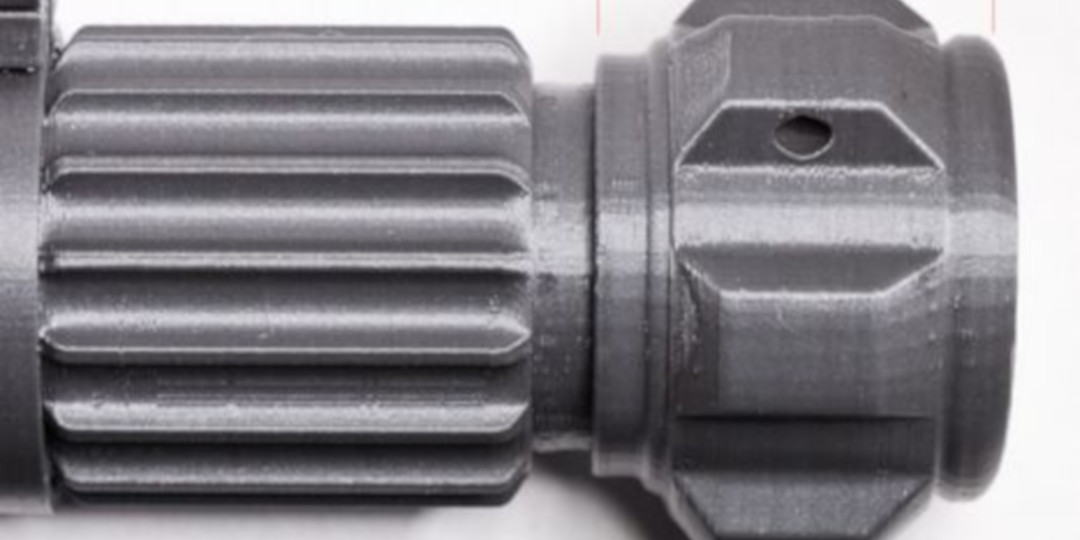
Seams are an important part of how mechanical objects appear, but they also present the problem of creating overhangs.
Making the cap a separate piece not only gives us the proper seam on the 14 piece design, but also makes a good place to replace batteries should you want to install a lighting module.
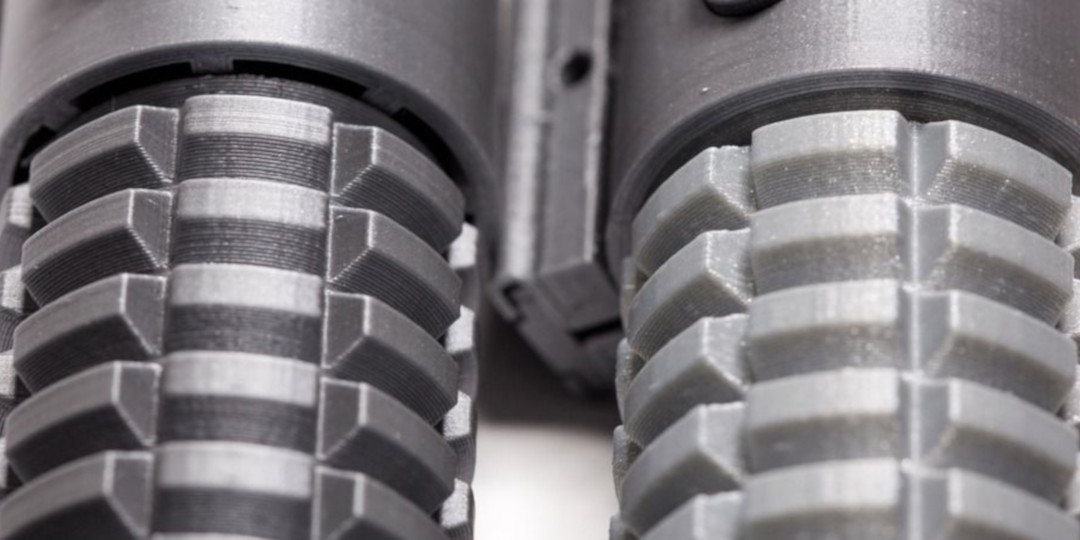
Another example of the importance of seams, separating the piece into multiple parts allow the ‘grenade’ piece to be slotted inside the clamp for a cleaner, more integrated look on the 14 piece design (right).
Is it worth it? All those parts?
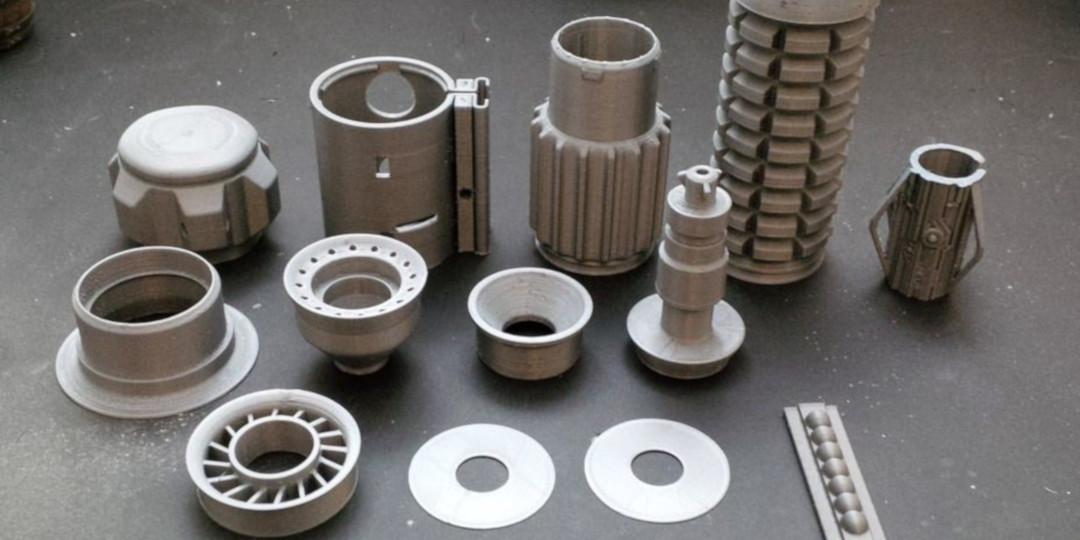
10 extra parts for just that little bit of accuracy? Well, there’s a couple more things to consider. If you want an accurate replica, it can’t stay grey and plastic... If you plan to paint the model, it is far less time consuming to paint parts already separated by their material so there’s no need for masking tape. The result is a much more efficient workflow and a more professional finish.
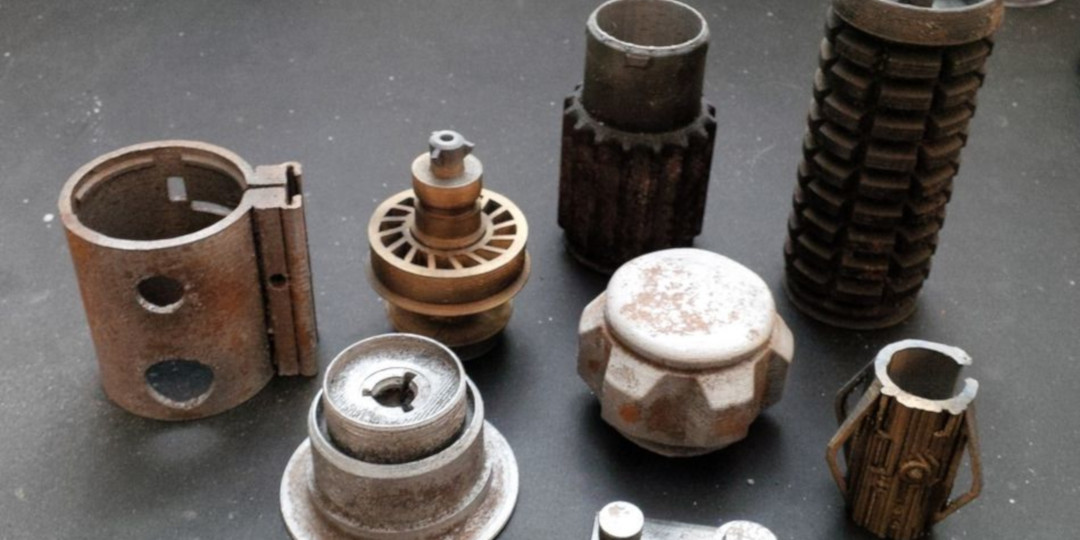
Here the parts are partially assembled into their material groups and airbrushed. No masking tape required.
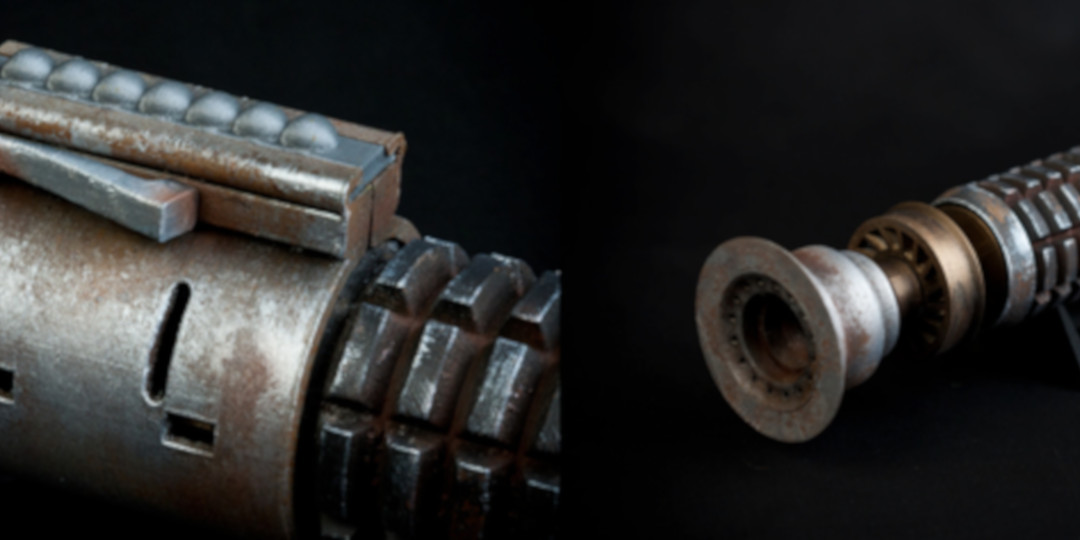
One final consideration. After the 14 piece design was done, it was relatively easy to simplify it down to a 4 piece design. So now you have both. One that emphasizes precision, and one for ease of use. the beauty of 3D prototyping, -quick changes, immediate results.
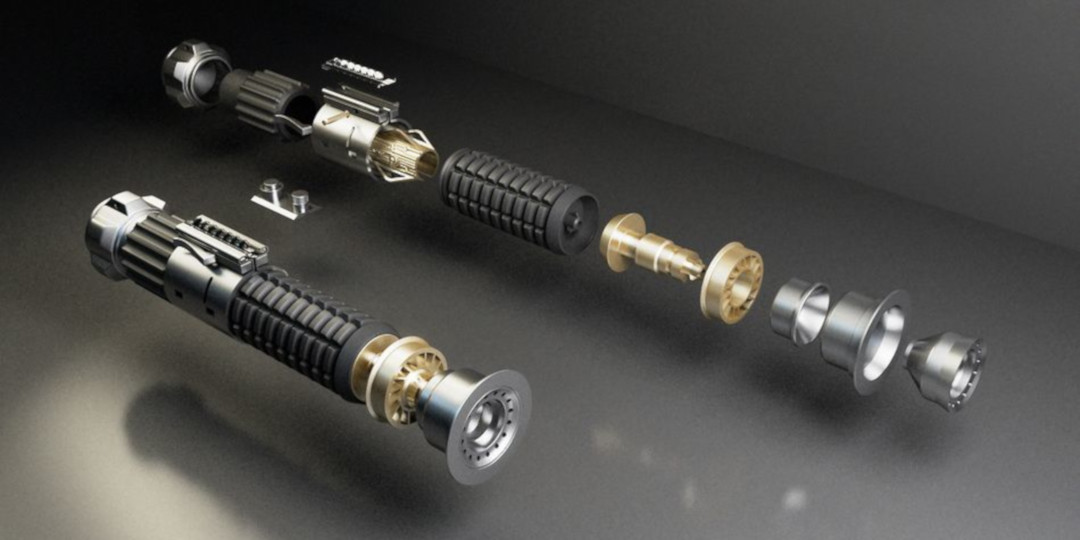
Want to see the differences for yourself? Here are a few tips & instructions on how to build your own 14 piece lightsaber for the detail oriented. You can download it from here.
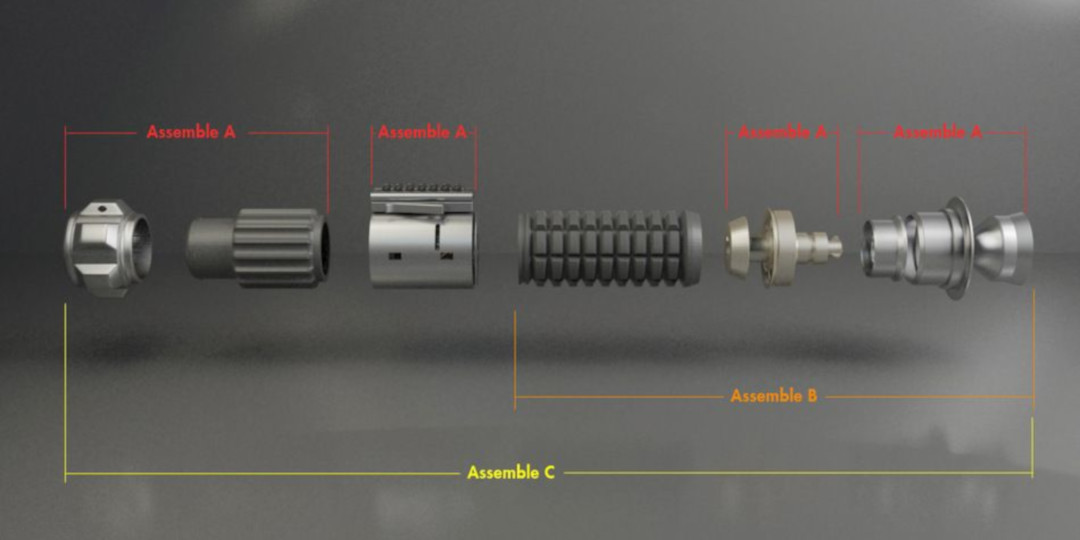
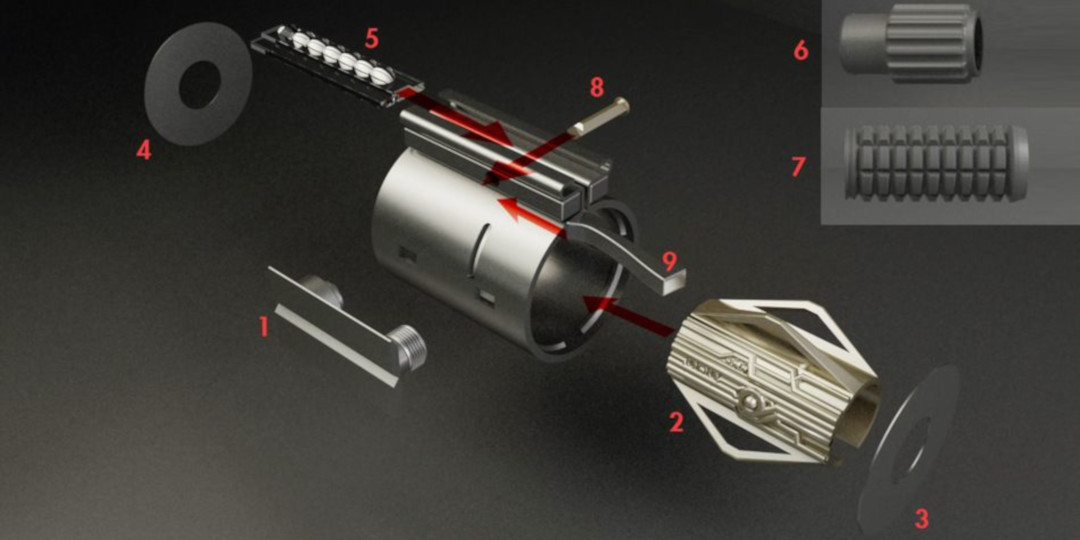
The Clamp is the most complicated part. The final pin will contend with a lot of friction but that’s what’s going to hold the whole thing together. You may need to shave off a few millimeters off part 8 or 9 to ensure a good fit.
Printing Instructions
Everything is designed mostly hollow where possible, so print with a low temperature, (filament dependent) and slow speed for best results (~40mm/s).
Part 8 and 9 require very slow printing due to their size. Print them both at once 2 cm apart, at 30% of 40mm/s.
Brim and support are not needed for any of the parts and will interfere with fitting. This example was printed at 0.15 mm layer height.
Once you have assembled it and everything fits, you can break it up into these parts and paint them individually. You need to ensure fitting before painting because you don’t want to have to sand or file parts to fit after the fragile paint coat is on, it’ll ruin your finish.
For people who aren’t familiar with 3D printing, they associate 3D printers with simplistic plastic table pieces and vases, but it is capable of so much more. The Ultimaker has been a seamless translator from the virtual world to the physical for me, it is truly an empowering device.


